
Ladies and gentlemen: We. Have. A. Backsplash! I think I'm still in disbelief. It's no exaggeration when I say I thought this day might never come. It felt like ages that we were backsplash-less as we trudged through the multiple layers of our DIY kitchen renovation. In reality, it's been about two and a half years since it all really started in this room (summer 2016).
First, let's take a look at what our kitchen looked like wayyy back when we moved in (circa 2008). Because the end result is always much more impactful if you know what it looked like before!

(These were obviously taken in different lighting, but the paint color's the same in both.)

50 shades of beige, gold and orange, amiright? Then a few years ago I painted all our walls gray, which was a much-needed improvement.


- I chalk painted and distressed our cabinets (white uppers, graphite lowers), then added new cabinet hardware.
- I painted the doors to our pantry and garage.
- We upgraded our light fixtures by replacing 3 old pendant lights with 2 new vintage globe pendants, along with replacing one flush-mount fixture on the ceiling with two can lights.
- We installed new vinyl plank flooring (throughout most of the main floor except bedrooms).
- We tore out our tiled countertop and backsplash. Not fun, in case you're wondering.
- We demo'd the entire sink cabinetry and re-built it at a slightly different angle (with mostly repurposed 2x4s and other pieces from our wood stash). Luke designed it to hold a new undermount farmhouse sink, a pull-out door for the wastebasket, and include a counter-height breakfast bar with 16" overhang.
- We bought oak butcher block countertop and did all the cutting, oiling and installing ourselves. It was especially time-consuming to cut and install the breakfast bar section which also contained the sink cutout.
- We added some heavy-duty brackets for floating shelves on one side of the kitchen (where we had also raised the cabinets about 8" just for this purpose).


I'm exhausted just thinking about it all. To be fair, it's been a lot for two people to tackle in sporadic chunks of time between jobs and life happenings in general.
By the time we added those brackets just this October, we realized that DIY-ing the mosaic tile backsplash (which had been purchased from Menards almost two years ago) wasn't going to be realistic. It made more sense to hire someone who could do it quickly and efficiently, rather than spend time figuring it out ourselves and fitting it into rare open weekends. Plus, I may or may not have had several emotional meltdowns by that time too... If reno-depression isn't already a real thing, I'm coining the term now.
Keep in mind that this kitchen makeover has just been one component of a larger main floor renovation -- which included tearing out entire walls to create a more open layout. Also keep in mind that this main floor reno derailed us from our basement-finishing. During summer 2016, the below is what it looked like up in this joint. Just keepin' it real, folks. DIY life ain't pretty.


Anyhow, I digress... Fast forward to this fall, we found someone who gave us a reasonable quote to install the backsplash and he was able to fit us in his schedule the week of Thanksgiving (talk about something to be thankful for!). As it turns out, even though DIY projects can be rewarding in their own painful special way, there's something to be said for paying a pro to get an occasional project done in just a couple days, for sanity's sake.
Here are a few progress pics during the installation. Adios, ugly sheetrock!


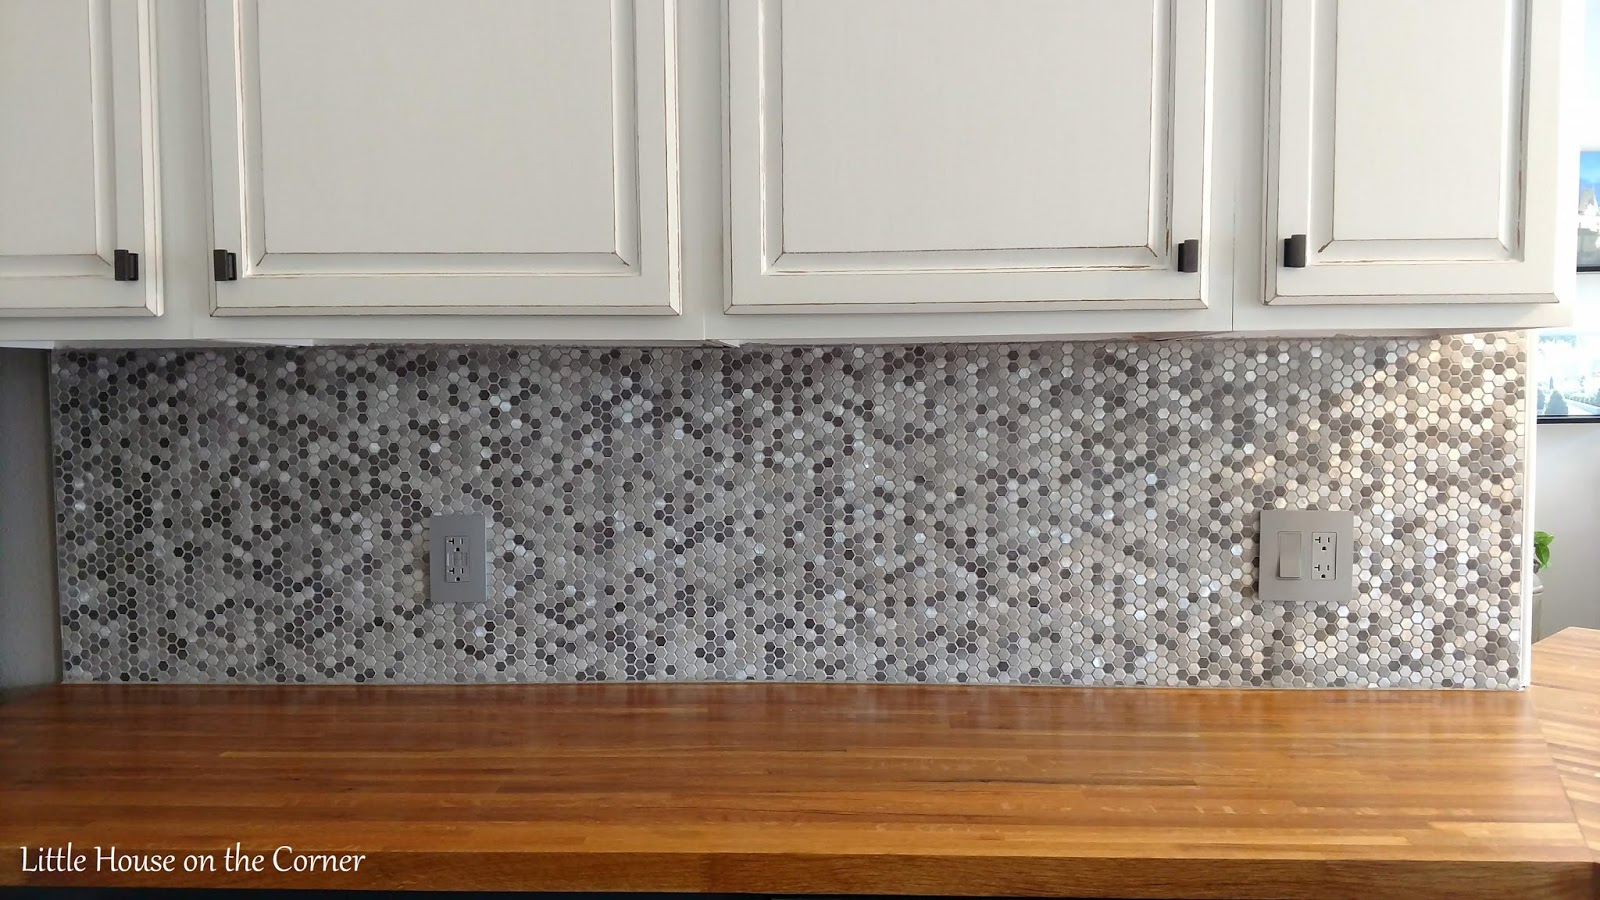
However... now that we had a fancy new backsplash, those old ivory outlets, switches and wall plates weren't going to cut it. I didn't want to go with white, but rather gray or silver so it would just kind of blend in with the mosaic tiles. I searched high and low at the home improvement stores -- most of the silver ones either looked too ornate or didn't have all of the matching pieces we needed. And all the gray ones were made for industrial/commercial use. Then I stumbled upon the Legrand Radiant collection at Lowe's, which gave me hope. The Nickel color definitely had potential.

But of course Lowe's didn't carry the 20-amp outlets we needed. That would have been too easy! So I just went directly to the Legrand website which had way more options available for order. I ended up getting everything in the Gray color (rather than Nickel, which came off looking a little too brown). It was only a few days until the package arrived in the mail, and I was pleasantly surprised at how well the gray worked. It has a subtle satin finish and just blends nicely into the backsplash without competing for attention. The plates are also screwless for a more sleek look. Worth the extra expense, in my opinion. (FYI, they offer 15% off your first order if you sign up for their emails.)

Sooo, now you're all up to speed on the current state of our kitchen! Whew, that was a lot of ground to cover in one blog post. Maybe I'll break up some of these individual projects into bite-size blog posts with more detail someday...
Overall I'm really happy with how it's all come together, despite how long and emotionally draining the process has been. My original inspiration was "modern farmhouse" -- I suppose that's all up to interpretation but I think it's still a pretty fitting description.


The chunky floating shelves (which will be made using some leftover butcher block) will be the perfect finishing touch, but I'm not sure we'll get to those this month. That's okay though, because the addition of the backsplash (and finally having the microwave back up where it belongs) is enough to satisfy me for awhile longer. Regardless, you'll definitely be seeing a lot more of our kitchen on the blog because it's the most significant thing I've had to show off in quite some time! You've been warned.
Have you ever taken on a kitchen renovation? If so, did you DIY or hire -- or a combination of both? I'd love to hear other experiences in the comments!
Product Sources:
- Cabinet paint: Annie Sloan Pure White & Graphite
- Oak butcher block countertops: Lumber Liquidators
- Mosaic backsplash: Mohawk Grand Terrace Metallic Medley
- Vintage/industrial globe pendants: 10" Pendant Lights from 1800-Lighting
- Farmhouse sink: Kohler Whitehaven Smart Divide apron-front sink
- Faucet: Pfister Briarsfield Pull-down Faucet in Tuscan Bronze
- Outlets/switches/wall plates: Legrand radiant collection in Gray
- Shelf brackets: Shelfology Aksel bracket
- Cabinet hardware: Cosmas oil-rubbed bronze contemporary knobs
- Butcher block oil: Real Milk Paint Pure Tung Oil mixed with Real Milk Paint Citrus Solvent

NOTE: Little House on the Corner is a participant in the Amazon Services LLC Associates Program, an affiliate advertising program designed to provide a means for sites to earn advertising fees by advertising and linking to amazon.com.

1 comment:
I absolutely love your December update! Your day might sound routine, but your storytelling makes it so charming and relatable.Driving Without A License In New Jersey The Christmas movie in the background adds a cozy touch to your writing. And congratulations on the backsplash—it's the perfect festive surprise in your ongoing DIY journey!New Jersey Domestic Violence Attorney Cherry Hill
Post a Comment