Sunday, January 2, 2011

Bathroom Makeover: Part I

For those of you who have been dying to know the paint color I selected for our hall bathroom, wait no more. In my search for a lighter, brighter color, I began gravitating toward greens. Maybe for some of you, this wouldn’t be a very big deal. But for someone like me, who tends to make “safe” choices, it was a bit of a bold move!

I knew that there were many ways that I could go wrong with this particular color: too pastel, too putrid, too pukey, too fluorescent, too garish… you get the idea. After comparing many paint samples and testing out a couple of them on the wall, I decided on the winner: Behr’s Mojito. The name alone was appealing enough, and I felt surprisingly confident that it would be just the shade I was looking for.

After clearing everything out of the bathroom and taking off the door, I started taping off the trim, bathtub, and sink with 3M ScotchBlue Painter’s Tape with Edge-Lock Protector (graciously provided to me by 3M in exchange for a review of their product). Maybe it was just my imagination, but it seemed like it had extra sticking power even as I was pulling it off the roll. I accidentally ripped it down the middle a few times, but I think that was from pulling it off too carelessly in my haste.


The taping itself was a little tricky in spots, only because the builders who painted all the rooms themselves did a sloppy job and had gotten red paint onto the trim, tub, mirror frame, and ceiling (see below). Apparently they didn’t feel the need to use tape, or to paint the the trimwork before putting it on the walls. So no matter how good of a taping/painting job I did, I’d still have to go touch up the trimwork with white in the end.

Also, when I tape, I prefer to do it in shorter, overlapping strips as opposed to trying to get the whole length of trim, etc. in one long strip.

UGH! Just look at the sloppy painting job on the trimwork and ceiling corners.
This would be a blast to fix.

Finally, it was time to paint!


This was the first time I’ve used Behr Ultra Plus Premium Paint & Primer. It was $35 for a gallon (satin finish), and had the consistency of a very thick pudding (pistachio pudding, for that matter).
After my white touch-ups on the ceiling had dried, I taped off those corners and used the new brush from my 3M painter’s kit to cut in all the corners and taped edges. I had hoped that maybe the paint & primer formula would be able to cover the red with one coat, but I soon realized how foolish that was.

Unfortunately, my photos don't do justice to this color. Next to the red, it just looks beige.


Painting the rest went pretty quick with the roller (also provided in my painting kit), except our 10-foot ceilings added a little extra time and effort. Getting behind the toilet took some additional neck-craning (to get behind the tank, I slid a piece of plastic sheeting on the backside and taped it on, then just shoved the brush as far behind it as I could).

Also, I used a small artist’s paintbrush to get in the narrow space between the sink’s cabinet drawers and our door trim.


The ceiling now looks a hundred times better than before. Woot!!


The room was undergoing a big transformation after one coat, but unfortunately a second coat was needed, so it ended up taking me most of the weekend to finish up.


I still had to touch up a few tiny red spots here and there (mostly due to our textured walls), but the two coats were enough to sufficiently cover the old paint. And I ended up having a little paint left to spare for any future touch-ups.

I was super-excited to start peeling the tape up. It came off nicely, and left a very clean line along the trimwork, tub, and ceiling. The only place it got a little messy was the grout around the sink. I’d say that’s probably due to a couple factors: 1) I was trying to cover up the red paint that was on the grout before, and 2) I don’t think crumbly grout makes a very good surface for adhering to.

As far as the 3M Painter’s Tape with Edge-Lock Protector, I was very satisfied with the results. With that said, I also feel like I wasn’t able to use this product to its fullest potential on this particular project. For instance, it would be great for achieving clean stripes, blocks, or other patterns. I think I'm going to try another smaller project with this tape in the near future.

Anyhow, I’m still in the process of getting the rest of the bathroom put back together and accessorized, so you’ll have to wait just a little longer for the full “before & after” reveal. And don't forget, I'll soon be having a giveaway for a roll of ScotchBlue Painter's Tape with Edge-Lock Protector! In the meantime, here's some handy product info:


Thursday, December 30, 2010

Mint-y fresh new year's resolution

I’m usually not very good with making New Year’s resolutions that I follow through with. In fact, I don’t even bother making one most years. After purchasing a house though, it’s a little easier to come up with goals, and they usually have to do with money.

Last year, we decided to start a savings account (I know, something that should have been done years ago). And this year, we’re going to try to do a better job of budgeting our money and analyzing where it’s going. This will really be beneficial to us, especially with a basement we’re planning on finishing in the near future.

And how exactly do we plan on making this happen? Mint.com.


We’ve heard about this site from several people who use it, and the reviews I've read are all very positive. It seems like a pretty comprehensive yet user-friendly budgeting site, and I think it will help keep us on track better than creating Excel spreadsheets or something, which we’d surely get behind on updating.

Does anyone else use Mint.com? If so, what do you think of it?

And, since this is my last post of 2010, I thought it would be fun to take a little trip down memory lane and recap my top 5 favorite projects of the past year (in no particular order):


Hole in the Wall (technically, we did this one a couple of years ago,
but I only wrote about it this year!)


TEASER: Get ready for another bathroom update coming soon!

Happy new year everyone!


Thursday, December 23, 2010

Tour de Christmas Decorations

For the handful of you that have actually found time to do a little bloggy reading over Christmas -- lucky you, because it's time to show off Christmas decorations! I don't really deck out our entire house (although I'd like to be able to, but I haven't acquired enough stuff). So here is my humble, here-and-there Christmas decor.

Nighttime view from the front porch: 


My drab-to-fab console table gives me even more space to decorate!

Tabletop tinsel trees I made last year


Pretty, glittery containers from Michael's, filled with potpourri (on our TV stand)


Our piano is decorated with some gold pine cones, Christmas cards, candle holders, and one of my cinnamon stick candles.


A fun jingle bell wreath (from Michael's), hung on our dining room mirror with ribbon

My DIY advent wreath/table centerpiece

We don't have many decorations on the outside of our house, but this year I decorated a cheap wreath and we hung it on the eave of our back porch. It's on the south side of the house, so it should be protected from the elements. And it's visible to people driving by the street next to our house, so now they have something nice to look at.


As you can see, our stocking holders are currently stocking-less. But don't worry, they will soon be adorned with some new personalized stockings my mother-in-law is making us for Christmas! I'm pretty excited to see them.

And last but certainly not least, our tree! (We do have presents under it now,
just not when I took these pictures.)


 Merry Christmas everyone!


Monday, December 20, 2010

Note to self: You are no Martha Stewart.

I was a baking maniac this weekend.

This year, I decided to put together some simple gift baskets with homemade goodies for my co-workers. I already had ideas for most of the goodies. Then, I stumbled upon this recipe for homemade marshmallows. How fun would that be along with some packets of hot cocoa mix?! It sounded easy enough, and I just had to invest about $4 in a candy thermometer from Walmart.

Without going into a lot of detail, let’s just say that this was not one of my brighter ideas. The mixture was so thick that I nearly burned out the motor of my electric hand mixer and got marshmallow goo sucked up in the holes where the mixer sticks go. (Admittedly, that was my fault because the recipe called for a stand mixer, which I don’t own.) The result was a big, white, sticky blob that--while it did have the texture of a marshmallow--was impossible to cut into chunks or shapes. And even when I did get a chunk off, I had to roll it in so much corn starch and powdered sugar that it didn’t even taste good. Needless to say, clean-up was not fun either. Big fat FAIL.

This experience was a humbling reminder that I am no Martha Stewart. Well, at least I can bake a mean loaf of bread. I made both banana (my mom’s tried-and-true recipe) and pumpkin, baked them in some mini loaf pans (Chicago Metallic brand from BB&B) that had been lightly greased and dusted with cinnamon/sugar, and they came out beautifully!


For chocolate-covered pretzels, I melted a 2.5 lb Ghirardelli Candy Making and Dipping Bar that I found at Sam’s Club for $6.98. It dries with a shiny, glossy, hard coat and tastes better than almond bark (in my opinion). I only dipped the pretzels halfway to stretch the chocolate longer, and it made a ton. I put these in little treat bags and tied with a ribbon.

 
Since I had already bought some hot cocoa to go with my failed homemade marshmallows, I still stuck a packet in each gift basket, sans marshmallows.

The last thing in each gift basket was a cinnamon stick candle, a project from a couple of weekends ago. All of this was nestled in green glittery wire baskets from Hobby Lobby (where else?). Then I tucked in one of our Christmas cards that were printed at Sam’s Club. Overall, I’m pretty happy with how my gift baskets turned out and I had fun putting everything together. Gift baskets like these are nice because they still take some thought and effort, but not a lot of money.


Hope everyone's ready for Christmas! I'll finally be sharing all my decorations later this week... and hopefully soon after that I'll be able to show off our newly painted bathroom!

Wednesday, December 15, 2010

Bathroom color - Selected!

Let's take a break from Christmas decorating for just a moment. If you've been following along, I've had a bathroom makeover on my mind for quite some time. So for the past several weeks, the sink looked like this.


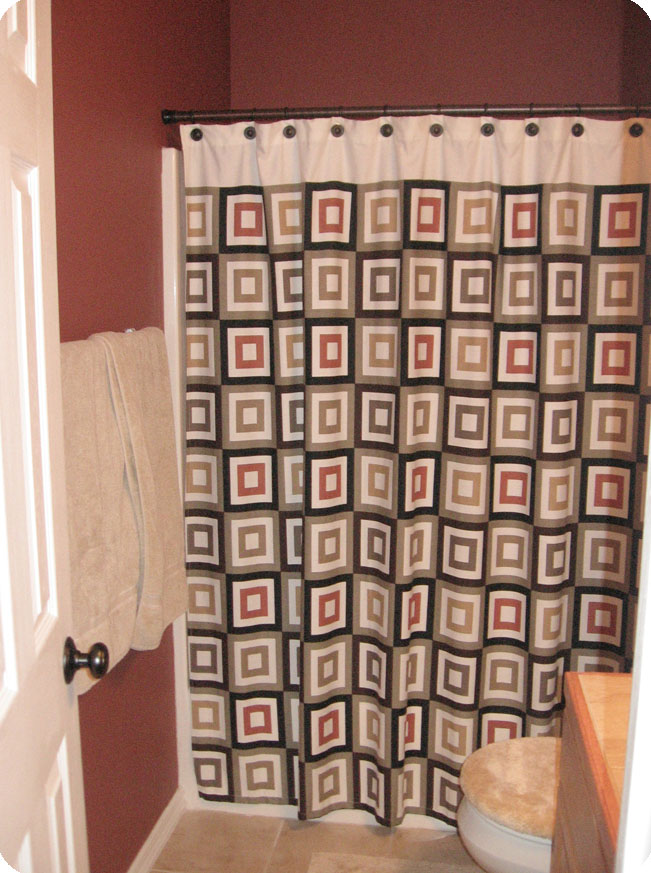
After much agonizing, sampling, and return trips to Home Depot, I finally decided on The Paint Color. My original plan to brighten up the space was to just pick a lighter color that still coordinates with the shower curtain. But this mainly involved a variety of tan and khaki hues that―although appearing to have potential on the paint swatches―would surely lead to beige-induced boredom once on the walls of this dimly lit bathroom.


My search for something a little more airy and invigorating led me to an area of the color wheel that I’ve been too intimidated to explore… until now. (Which also means I’ll have to get a new shower curtain, rugs, etc… oh darn!)
I’ll give you a hint… this Behr hue is named after a deliciously refreshing alcoholic beverage often associated with summertime. Any guesses?

Painting is underway, so stay tuned for the upcoming bathroom reveal, as well as my review of 3M ScotchBlue Painter’s Tape with Edge-Lock Paint Line Protector!

Sunday, December 12, 2010

Easy $15 Christmas Wreath

Well, it's time to join another Dare to DIY Party at Newly Woodwards! This week, it's Dare to Deck the Halls. With my $10 36" wreath, gold ornaments, and ribbon (all purchased after Christmas last year during an exciting trip to Michael's), I got to work fashioning a wreath to hang outside our house.


The first step was attaching the ornaments to the wreath. Floral wire would have been ideal for this, but I didn't have that on hand, so I just used kitchen twisty ties to secure the ornaments onto the wire frame on the back of the wreath.


Then, I wrapped the ribbon loosely around the wreath and tucked it into the "branches" here and there. It was a little tricky to get the spacing right until I was happy with it. I also secured the ribbon onto the wire frame on the backside to keep it in place.


Simple, gold, and pretty! I haven't decided whether to hang it above our garage or back porch though, so you'll have to wait and see where it ends up.

And while we're DIY-ing, here's another quick and easy project. I had some clear ornaments (again, on sale from Michael's) which have been waiting since last year to be properly attired for our tree.

I just stuffed them with some various fillers like ribbon, tinsel, fake snow (with the aid of a funnel), and bead vase filler. This would probably be a fun little project for kids, too.


So those are my super-simple DIY decor projects. I'll be sharing the rest of our decorations later this week. Is it just me, or is it hard to believe Christmas is less than two weeks away?! Are your halls all decked out yet? If not, be sure to check out Kim's party for some creative inspiration!
Dare to DIY

LinkWithin

Related Posts with Thumbnails