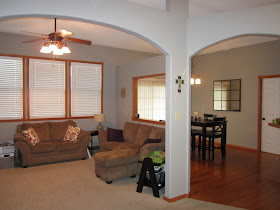
By golly though, I'm determined to get this blog caught back up with all our ongoing home remodeling projects. Let's backtrack to something I've skipped over until now, but it's actually been one of the most integral parts of our entire main floor renovation.
It actually started last May. As in, May of 2016. This is when we took down some [non-load-bearing] walls. Actually, my husband and my father-in-law did most of this demo work one weekend while I was out of town (and I was okay with that).
First, here are a few before pictures of the space with walls. As you can see, our living room and dining room were disjointed and a bit claustrophobic. (Although, we did do our best to improve the situation by creating this window opening when we moved into the house.)
And now, here's what it looked like once the walls had been torn out! Keep in mind, we also had to deal with re-routing some electrical wires from outlets and light switches that had been in the walls. So that added some extra complexity and time into this already daunting project.
Embarrassingly messy, but hey, it's just real life.
Our poor dogs have been so confused by all this. Bless their hearts.
Yes, that's our microwave in the dining room, thanks to an ongoing kitchen renovation... Sigh.
The view looking out from our kitchen.
Anyway. We did our own sheetrock patching, but left it up to someone else to come do the mudding and taping, along with spraying on the textured finish. We're crazy DIY-ers, but there are a select few things we'll leave to the professionals.
Needless to say, the re-finishing of the walls was a very messy process that took several days. We had to clear out all the furniture and cover my recently painted kitchen cabinets with plastic sheeting. Oh, did I mention that we also had our entire ceiling re-finished at the same time? Yeah. It was much needed, due to some unsightly seams from when the house was built, and the timing was right to just get it all done at once.
So of course, I was left to do a lot of touch-up painting after the fact (as if I haven't already painted enough in this house!). It was exhausting and overwhelming and seemingly never-ending. Full disclosure, I was in serious pity party mode.
But the end result? You would never know those walls even existed! And that made it all worth it for this new, open layout.
If I remember right, I think this particular project wrapped up sometime last fall. After that we started ripping out our old carpet (sneak peek at the new floor in the above two pictures), but that's another blog post for another day!

NOTE: Little House on the Corner is a participant in the Amazon Services LLC Associates Program, an affiliate advertising program designed to provide a means for sites to earn advertising fees by advertising and linking to amazon.com.


No comments:
Post a Comment
Your comments make my day!